Lesson 1
| horror_posters_to_recreate.pdf |
For this task I would like you to pick a film poster recreate it. Take a look at the Horror Posters to recreate pdf and choose one of the film posters to recreate - they become more challenging - choose one that you find inspiring rather than simple to recreate.
Think of this process as 'artist research'. As you know, when we complete any project we research multiple artists before coming up with our own original ideas and it is exactly the same in this project, only we will focus our research on posters instead of artists. This is an incredibly valuable task because it will further your knowledge of how film posters are put together in a practical sense.
Think of this process as 'artist research'. As you know, when we complete any project we research multiple artists before coming up with our own original ideas and it is exactly the same in this project, only we will focus our research on posters instead of artists. This is an incredibly valuable task because it will further your knowledge of how film posters are put together in a practical sense.
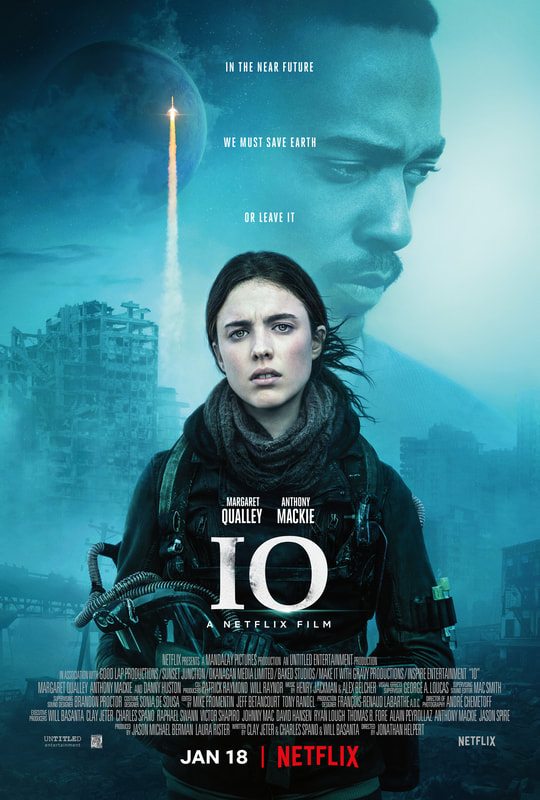
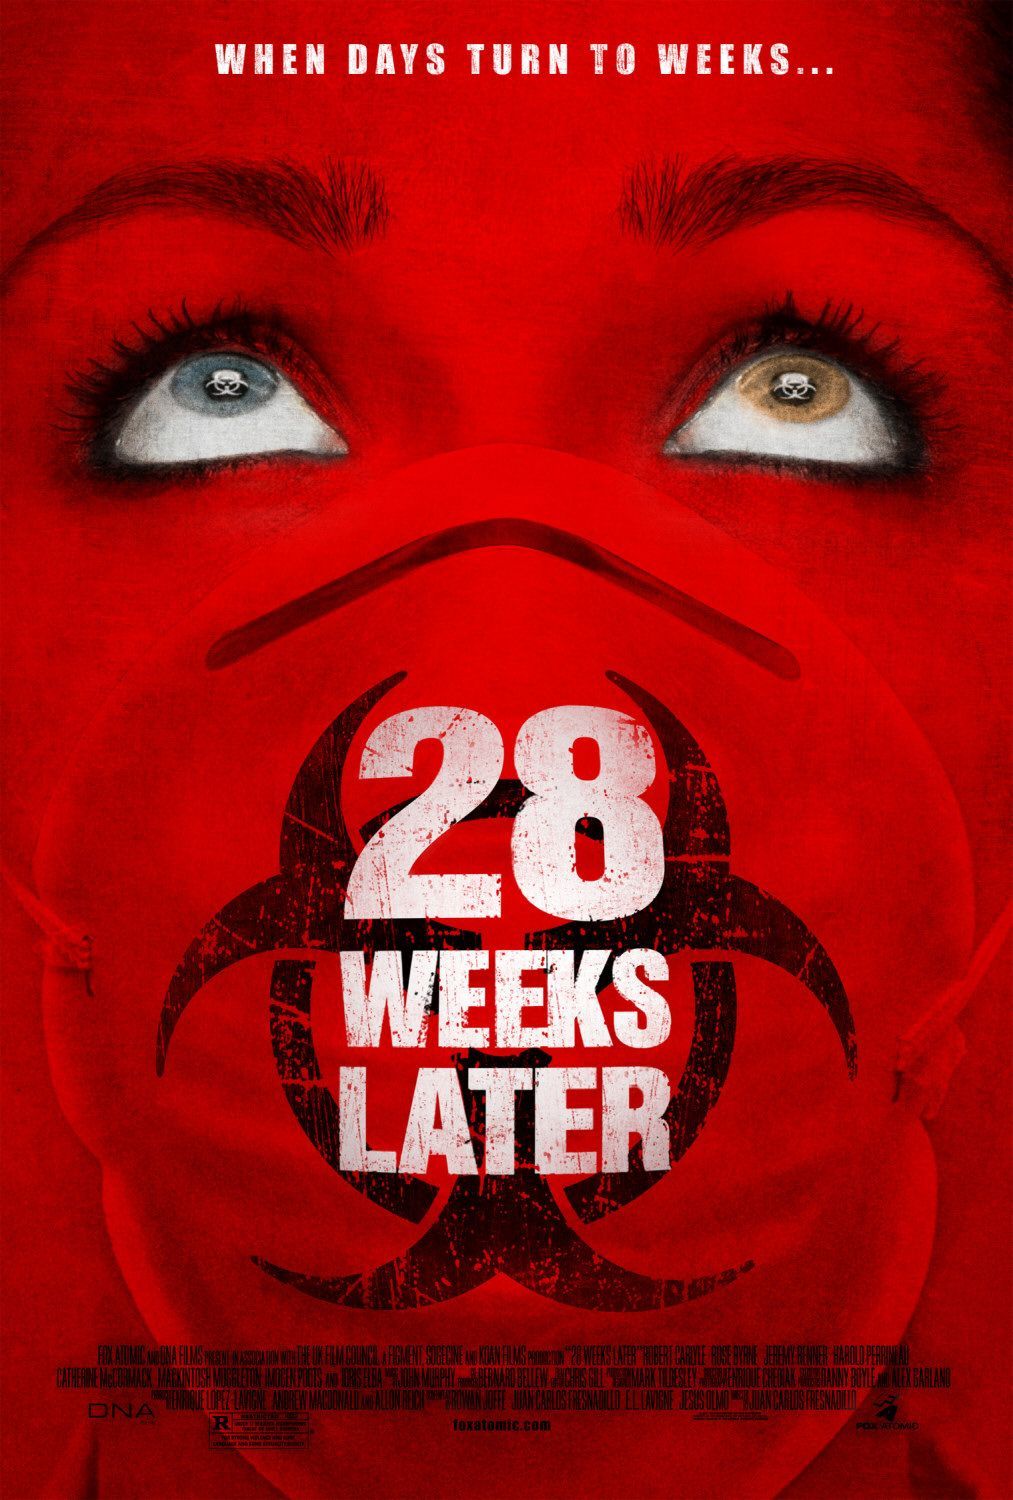
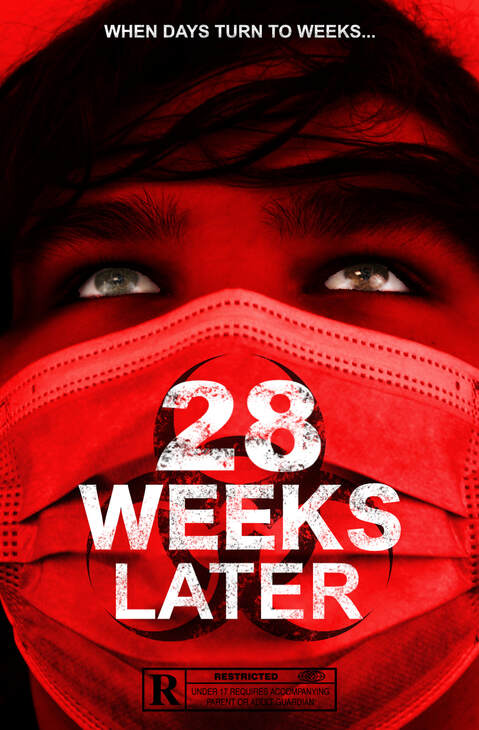
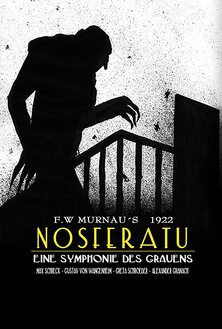
Original poster
|
|
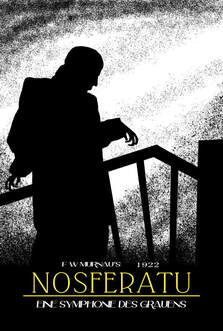
Recreation
|
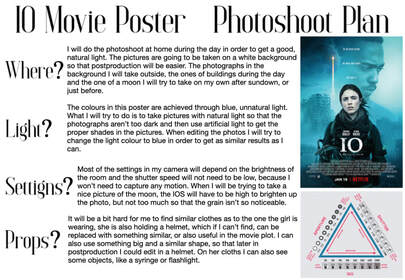
The first stage of your recreation is to plan a shoot, the photos from which you will edit to create your film poster recreation. To complete this task successfully you will need to pay close attention to the way in which film posters are constructed.
- Is there more than one photograph in the poster?
- Which editing techniques have been used to put the different elements together?
- What does the layout look like?
- What typography has been used?
Task 1:
Create a single slide on Google Slides inside your Y10 Photo Folder with the title '(name of film poster) Recreation Photoshoot Plan'. You can also create your plan straight onto your site if you would prefer.
Make notes and add pictures to inspire you.
You may use the sentence starters/sheets below.
Green (grade 1-3)
Copy and paste and finish these sentences:
• I will do the photoshoot…… (where and when) because…………..
• The props I will need for this shoot are……….
• The techniques I will use are……………. because…………..
• The lighting will come from………… which will give me a mood of………..
• The dangers of this shoot may be…………….
• My plans link to the film poster I have deconstructed because.........
Amber / Red
Ensure that you have included the information in the green task, but also add extra information about:
- Camera settings
- Compositional guidelines
You might like to create a mind map/list of bullet points for your shoot plan.
You get extra marks for including sketches of how you would like your photographs to look/how you will set up your shoot, so consider drawing sketches, photographing them and inserting them as 'images' on your site, as well. Take a look at the handouts and examples of plans below to help you.
Task 3:
Upload your work onto your site underneath the title '(name of film poster) Recreation Photoshoot Plan'.
Lesson 2
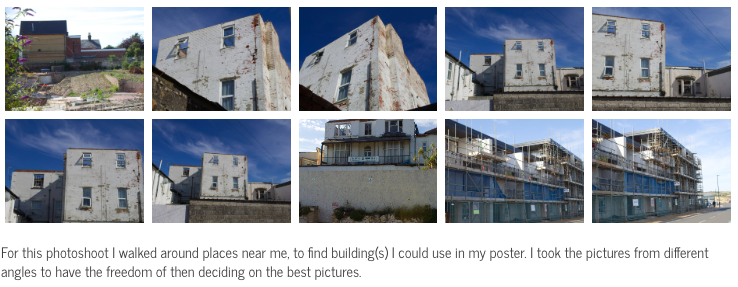
The next stage is to complete your shoot for your recreation.
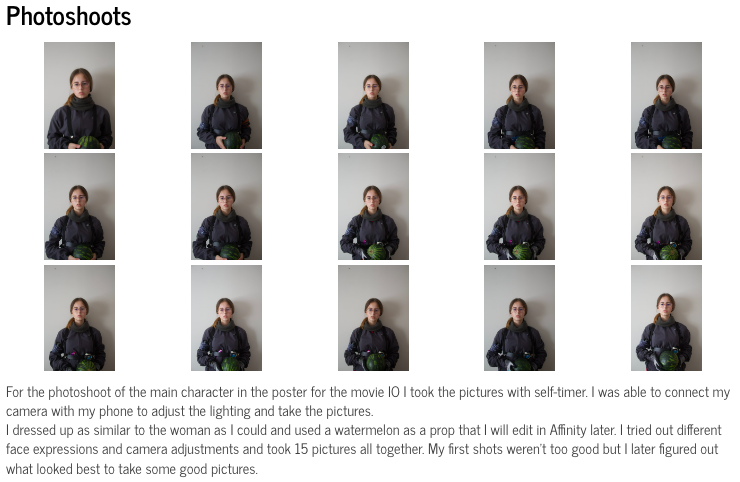
Shoot 1
|
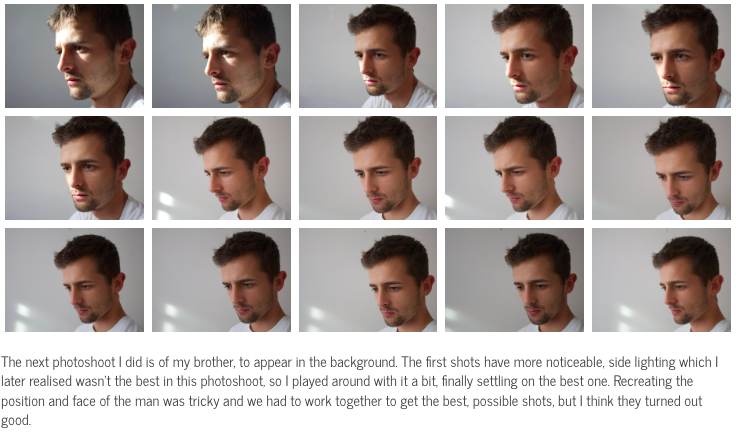
Shoot 2
|
Shoot 3
|
Task 1:
Green (grade 1-3)
Complete one shoot where you take 4 photographs for each section of your film poster which you will later edit to recreate your film poster.
- Consider how you will edit your poster together - do you need a few photos of the people in your poster, a few of any props you might need and a few of the background which you will then edit together?
Amber (grade 4-5)
Complete one or more shoots where you take at least 8 photographs which you will later edit to recreate your film poster.
- Consider how you will edit your poster together - do you need a few photos of the people in your poster, a few of any props you might need and a few of the background which you will then edit together?
- Also think about lighting, (time of day if using natural lighting) angles, the overall composition of your images, your choice of model, costume, props and background.
Red (grades 6+)
Take as many photographs as you wish. Variety is key.
Amber +
- Try to vary the angles from which you take your photographs, how close you are to your subject, which parts of the scene you are zooming in on etc. in each of your photos.
- Ensure that all of your photographs are in focus, and have used camera settings appropriately.
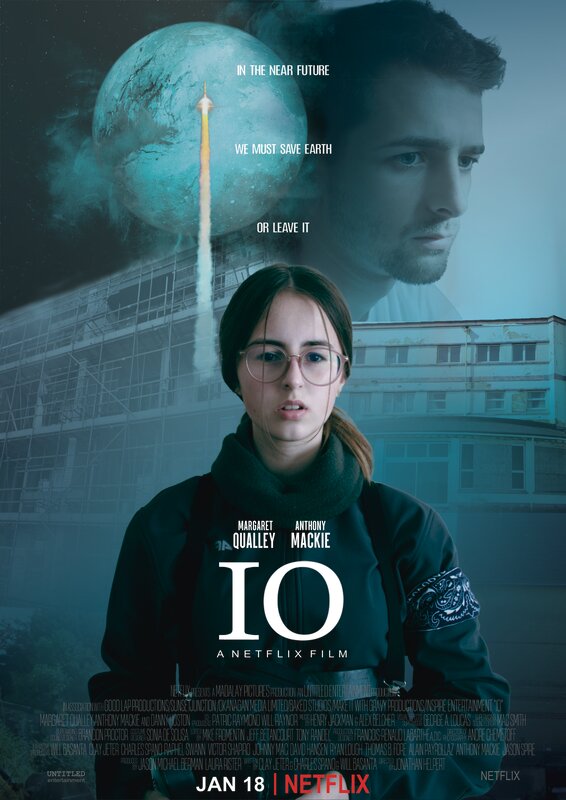
Original poster
|

Unedited image from shoot
|
Recreation
|
Task 2:
a) Add a title underneath your photoshoot plan of '(name of film) Poster Recreation Contact Sheet'.
b) Create a new folder in your Photography folder in your Google Drive with the title '(name of film) Poster Recreation Contact Sheet' and upload your photos to that folder.
c) Upload your photographs to your site in rows of four. Screenshot your contact sheet, delete the individual images & upload your screenshot.
If you completed the red task during your last lesson then try to be selective with the photographs which you choose to include. You should have at least 12 photos in total, but they should be your very best ones.
Task 3:
Underneath your photos, annotate your shoot answering the following questions:
- What did you do during the photo shoot?
- How did you take your photos, what props/lighting did you use and why?
- Did you create a mood/atmosphere through the facial expression/pose? How?
- What are the strengths of your photos and why?
- If you were to complete your shoot again, what would you do differently to improve your shots?
Lesson 3
The final stage is to edit your photos using affinity and add text to them to create a finished recreation.
Task 1:
Green (grade 1-3)
a) Choose your favourite photograph(s) from your Film Poster Recreation Shoot.
b) Edit your photo(s) so that they look as close to the original poster as possible.
This might mean making basic adjustment edits such as cropping, exposure, saturation, contrast - as you have done in previous lessons.
Amber (grade 4-5)
Green +
You might use:
- Replace the background
- Double exposure
- Selective colour changing
- Any other technique which you feel confident with
If you are unsure which techniques you might need to use to edit your photograph successfully then please talk to me so that I can help you with your creative process.
Red (grades 6+)
Amber +
If you think that you can improve upon the photographs you have taken previously you can plan and take a new set of photos for this poster and then edit.
Remember to upload your new set of photographs underneath the title 'Poster Recreation Refinement Shoot'.
Task 2:
Complete your poster by adding the suitable typographical elements of a film poster according to the poster which you are recreating. Remember that most posters have some (or all) of the following:
- The movie title - The tag line - The name of the director
- Production company logo - A billing block - The release date
- Names of main actors or characters
Task 3:
Add a title to your site of '(Film name) poster recreation'.
Upload your poster and write two or three sentences underneath your photos to reflect on what you have created.
Use the sentence starters below if it helps you - do not need to use them all or in this order and feel free to add to them if necessary:
Whilst completing my recreation I learnt...
I think that my recreation would have been more successful if...
What I enjoyed most about this process was...
When creating my own film poster, I might take inspiration from this process by...
