Lesson 1
Now that you have explored a variety of possibilities and picked your favourite idea to develop further, you should continue to explore this idea in order refine and improve it so that your final outcome is as good as it can possibly be.
Remember that to be successful when creating your final outcome you need to:
- Produce a series of images (3 or more) for your project
- Your series must bring together all of the best parts of your experiments
- You must include elements of all of the artists you have looked at (most have 2 artists, some of you might have 3)
- Your series of images must look like they go together - similar techniques, colours etc.
- They might tell a narrative across your images - eg. 3 parts of a story
The first step is to complete another photoshoot linked to your idea.
By completing another photoshoot you can ensure that the photographs which you are working with are exactly as you wish them to be.
This might mean taking similar photographs to the ones you originally took for this idea, or taking photographs which are different depending on how you would like to refine your concept.
I will be asking you to complete one more shoot after this one - those are the photographs that you will edit into your final outcome for this idea - so think of this as one final opportunity to try out any ideas which you might have and see how they look before you take your final set of photos.
Task 1:
Take a look at the example below to see how your next shoot could differ from the first one you completed and how that might develop into a final outcome for your first idea.
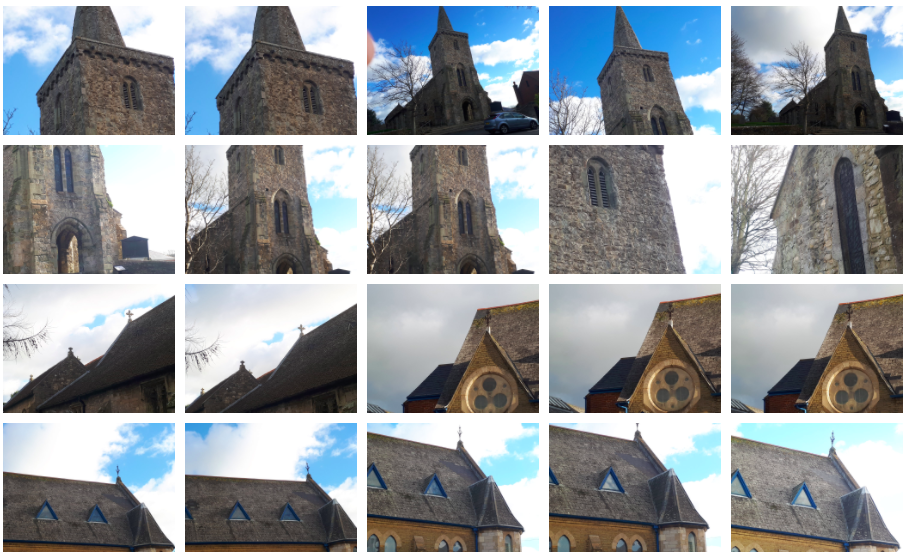
Shoot 1
|
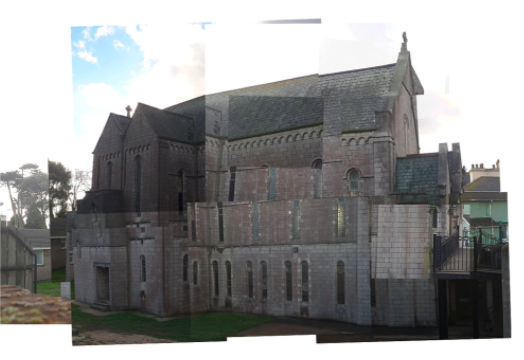
Edited photo 1
|
This pupil is working with the themes of architecture and distortion.
For their first shoot, they took photographs of a church from a variety of angles and then edited them to create a 'joiner', placing all of their photographs together to make one large, distorted image of a church.
For their first shoot, they took photographs of a church from a variety of angles and then edited them to create a 'joiner', placing all of their photographs together to make one large, distorted image of a church.
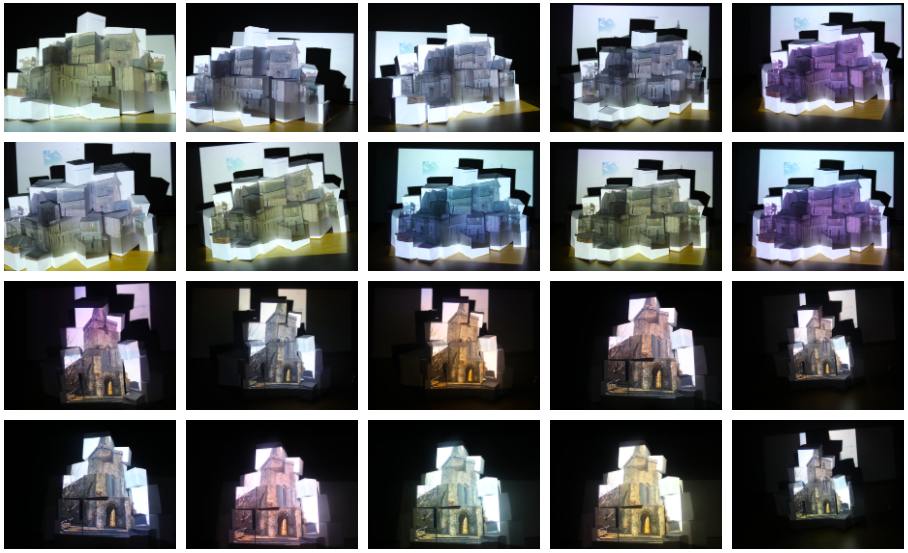
Shoot 2
|

Edited photo 2
|
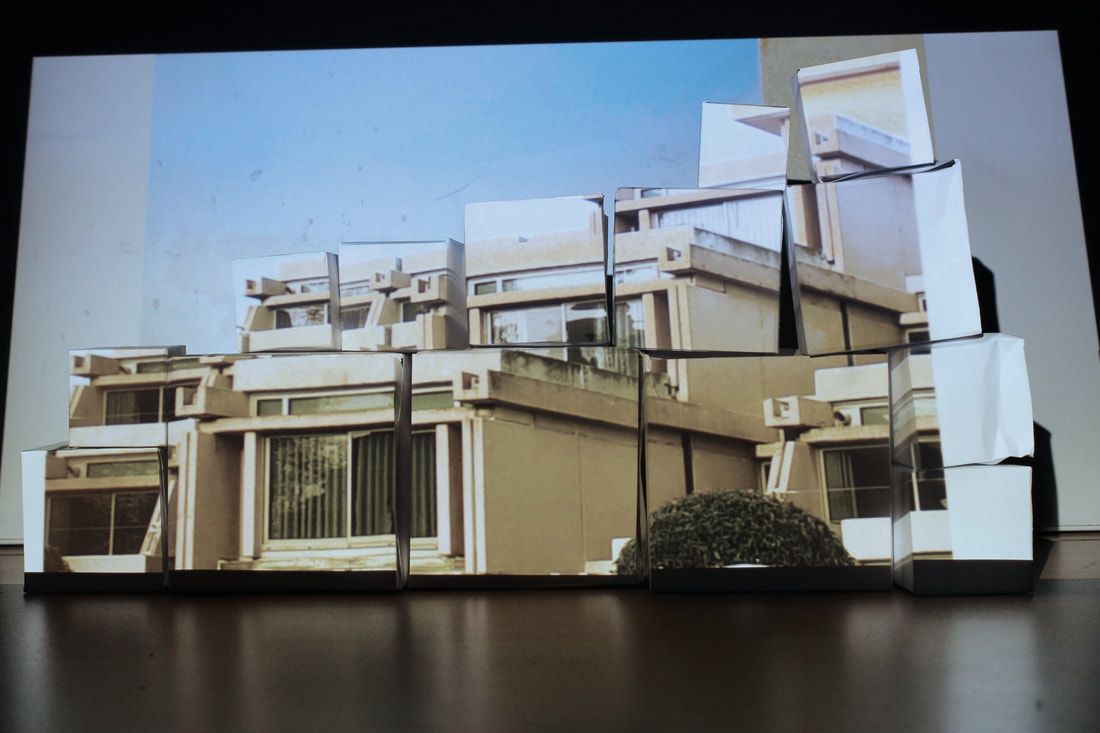
They then developed this idea further, creating white cubes out of paper and projecting the joiner they had created previously onto the cubes in order to create more distortion in their final photograph.
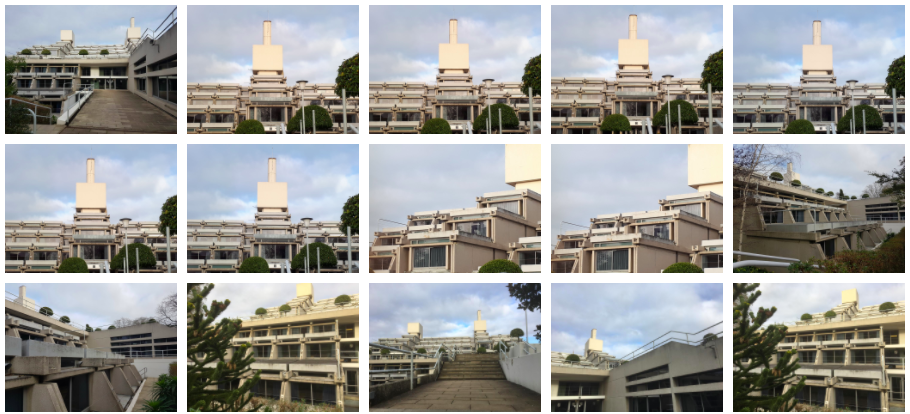
Final outcome shoot
|
Final outcome
|
Happy with this idea, they completed one final shoot, looking for buildings which had more lines and shapes within them, which the pupil then projected onto their white cubes to create their final piece.
You can see in this example how the pupil's idea has improved each time they have completed a new shoot, whilst keeping the core theme of architecture and distortion the same.
You can see in this example how the pupil's idea has improved each time they have completed a new shoot, whilst keeping the core theme of architecture and distortion the same.
Task 2:
Green (grade 1/2) - Improving your current idea for a series of photographs, complete one shoot where you take 12 photographs.
Amber (grade 3)- Improving your current idea for a series of photographs, complete one shoot where you take 15-20 photographs.
Red (grades 4+) - Improving your current idea for a series of photographs, complete a shoot where you take as many photographs as you wish. Variety is key.
Lesson 2
Task 1:
Upload your photos into a gallery on your Weebly site with the title 'Idea one refinement shoot'.
Task 2:
Open the best photo in Affinity (or another editing app if you do not have access to Affinity at home) and edit your photograph to enhance it.
How you choose to do this will depend on the idea you are developing, feel free to message me or find YouTube tutorials to help you if you are unsure of how to edit your photos.
Task 3:
Export your edited photo as a JPEG then upload to an image element under the gallery you made for your last shoot so that your photo is large and you show off your skills.
Repeat with a second photo.
Task 4:
Green (grade 1/2)
Write a short paragraph to review your photo shoot and edited photos. Put this underneath your large edited photo. Discuss the following:
- What did you do during the photo shoot?
- How did you take your photos, what props/lighting did you use and why?
- Did you create a mood/atmosphere through the facial expression/pose? How?
- What are the strengths of your edited photos and why?
Amber (grade 3)
Write a short paragraph to review your photo shoot and edited photos. Put this underneath your large edited photo. Discuss the following:
- What did you do during the photo shoot?
- How did you take your photos, what props/lighting did you use and why?
- Did you create a mood/atmosphere through the facial expression/pose? How?
- Which compositional guidelines did you use and why?
- What are the strengths of your photos and why?
- How do you plan to develop this photograph into a final outcome for this idea?
- What could you do differently in either the photo shoot or the editing?
Red (grades 4+)
As with the amber task, but also carry out whatever you just said you could do above to develop your work independently.
This would need to be done when everything else is finished. It might involve a new photo shoot or it might just be a different edit.
